9 Block Diagram

9 Block Diagram Of The Dfe Download Scientific Diagram
Solved Draw The Equivalent Signal Flow Graph For The Ab

Homework Assignment 9 Block Diagrams And Butterworth
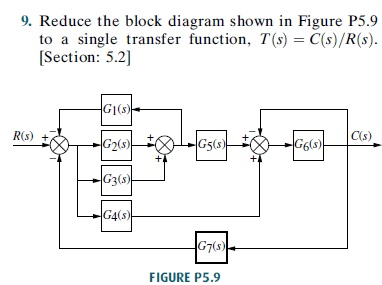
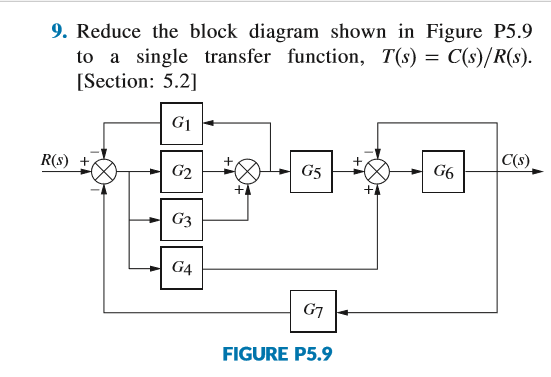
9 Reduce The Block Diagram Shown In Figure P5 9 T

9 Block Diagram Of An S Fractional N Pll Download

Arm 9 Block Diagram Wiring Diagram G11

Figure 3 9 Block Diagram Of A Steering System
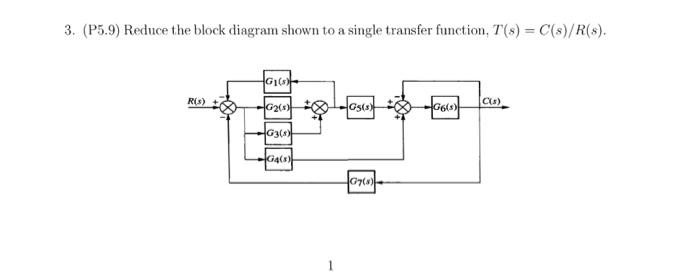
Solved 3 P5 9 Reduce The Block Diagram Shown To A Sing

Great Leadership The Performance And Potential Matrix 9

Functional Flow Block Diagram Wikipedia

3 9 Functional Block Diagram For Ov7640 Vga Camerachip

Ca520 9 Wireless Pan And Tilt Camera Block Diagram Rdi

Issue With Rtc Block Diagram On Zynq Ultrascale D

9 Block Diagram Of The Hydro Mechanical Load Sensing

Solved 9 Reduce The Block Diagram Shown In Figure P5 9 T
1 Beacon Transmitter Block Diagram Visio
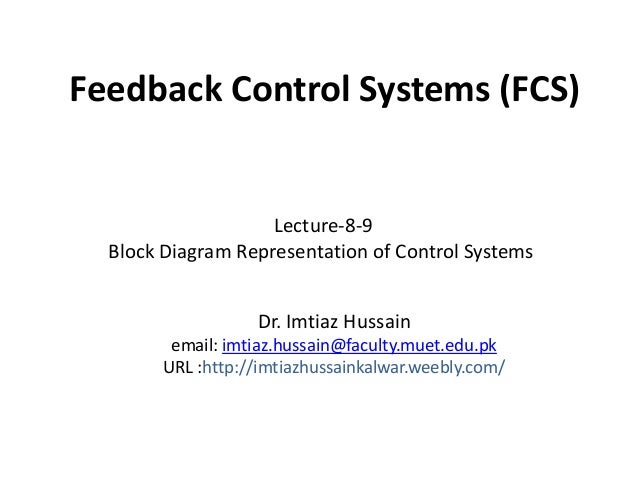
Lecture 8 9 Block Diagram Representation Of Control Systems

Block Diagram Of The Dynamic Control System Figure 9 Depicts
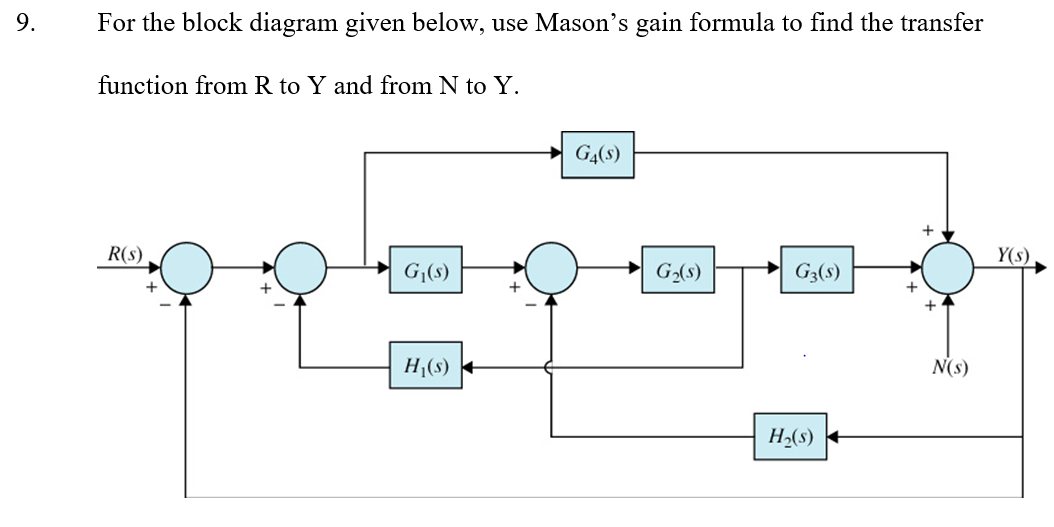
Solved 9 For The Block Diagram Given Below Use Mason S
9 Block Diagram Six Sigma Wiring Diagram

Sta 9 Ulcam Block Diagram Nuprime Audio
Source : pinterest.com
